Thursday, October 29, 2015

Halloween Candy Cauldron V2.1 upGRADE

Forget all that stuff in my last post about what I cooked.  I went back to the Uno version, really at a loss about why everything stopped working.  I decided to check power, first on the 5V rails--no power!  Then, I check what was coming from the 5V pin on the Uno. Nothing.  The only answer (other than a cooked Uno, which I did not believe) was a bad jumper wire.  Sure enough, I did continuity tests on the wires and one was bad.  I replaced them and it worked. So, the sensor and amp are both fine.


I went back to the Trinket.  It's putting out static only.  Same sensor, same amp. So, maybe I cooked the Trinket.  I'll have to decide whether I want to solder up another Trinket and perhaps sacrifice it this year or wait until next. As for now, I've spent a WHOLE LOT OF TIME working on something that already worked,  I have the bigger cauldron, and I have a switch, and it works again.

My other upgrade for next year is to put the Trinket--or Uno if I can't get the Trinket to work--into low-power mode while it's dormant to save battery and avoid having to turn it on and off so much. I've just learned how to do that in concept and this appears to be a good application.

So. I can take it to work tomorrow to entertain my co-workers. Since Halloween is a Saturday, I'll decide then if I want to spend more time (and maybe money) getting the Trinket version to work again.

I feel much better! On to 3.0!


Halloween Candy Cauldron V2.1 (update,not upgrade--more of a downgrade)

I was having a problem with my candy cauldron: the Pro Trinket was resetting at random intervals, and the circuit would not resume unless I powered off and back on.

I surmised that the problem was power.  I was powering the 5V rails from the 5V pin on the Trinket. (This worked on the Uno, but maybe the Trinket doesn't put out as much current).  So, I took the 9V Vcc to the BAT and GND pins of the Trinket, then to the IN and GND pins of an LM7805 voltage regulator, and powered the 5V rails from the OUT pin on the LM7805.

All was good. No more reset.  I took the cauldron to a meeting in the morning and had fun.

Then I got greedy. The cauldron is very small, which limits the candy.  It's limited anyway, and in addition if candy is piled too high the sensor sees it and sets off sounds. Also, there was a sound problem: since the HC-SR04 sensor is ultrasonic, if the sound being played is long the sensor detects it and plays the next sound even if no one reaches in, and will continue until it gets to a shorter sound. For example: the howl is long but the cackle is short--if the randomizer selects the howl, it will play at least one additional sound until it gets one like the cackle; if it selects the cackle, it plays only that one sound. I had put in a 5 second delay to wait for the sounds dissipate, but that wasn't enough for all sounds and I didn't want to make it longer because that makes the candy grabbers wait too long.

So, I got a bigger cauldron and that worked fine--briefly. It played only one sound at a time since there is more room for the sound to dissipate. Then the problems: I do not know what happened, but it started producing static only and resetting--at first randomly and then continuously, then stopped producing sound altogether.  I thought I might have cooked the Trinket, but it doesn't work on the Uno either. The sensor is not registering, so I probably cooked my last one. According to my meter, there is a signal on the speaker pin when there is supposed to be, so I may have cooked the amp too. I swapped that out, with no success...but the amp I swapped to was the one I thought was cooked earlier but discovered I wired it wrong--maybe I really did cook it. I have more, but I need to solder on headers and a terminal block before testing.

So, I don't know if I'll be ready for Halloween.  If I get the amp to work I may invest in a retail HC-SR04 at Radio Shack while I wait for my $0.88 ones to arrive from China.

I'm not happy.

Monday, October 26, 2015

Halloween Candy Cauldron V2.0

Last year I was enticed into a Halloween Project.  I was working on my donkey, which involved sound, at the same time many of  the +Adafruit Industries  weekly #ShowandTell and #WearableWednesday projects had a Halloween theme, and of course there's the #electroninchalloween hashtag.

So, I came up with the idea of a candy dish that made Halloween-ey sounds when someone reaches in for candy. It was a big hit with adults, but kids less impressed.  I realized that I had some design flaws.

Here's my appearance on the Adafruit Show and Tell, while I was still working on the SD card reader. It should start just before my section (after you skip the ad), but if not, I start at about minute 18.

First, I did not enclose the circuitry, so aggressive candy grabbers could introduce failure (adults were bigger offenders here).  Second, I wanted to use the +SeeedStudio SD Card Shield, which meant I needed to include an Arduino Uno. That was fine, because the shield sits on top of the Uno and the Adafruit Class D Amp uses 5V. Most SD card readers, particularly MicroSDs, want 3.3V.  I could do this off the Uno, but I needed another approach if I wanted to use a different board with one voltage level or the other.

I had a Adafruit Pro Trinket (5V) around, so I decided to use it.   I need the Pro Trinket as opposed to Trinket, because the smaller (non-Pro) version doesn't have enough pins to support SPI, which I need for the SD card.  I does not have a digital pin #7, which I was using for the Echo Pin on the ultrasonic sensor, so I has to change that to #6. Fortunately, I also had an LC Studios SD Card Reader that accepted 5V or 3.3V. That simplified matters, avoiding a voltage regulator and  logic level converter (which I have, but simpler is better),  The Pro Trinket can be powered from up to 16V, so I'll bring 9V  into it and power a 5V rail from the Trinket.

See issues, below,  I had 2 of the LC Studios boards. One would not work at all.  The other I got to work with the Uno but not with the Trinket. So, I ordered an Adafruit Micro SD Breakout Board. More expensive, but it works--and I am supporting a my favorite supplier.

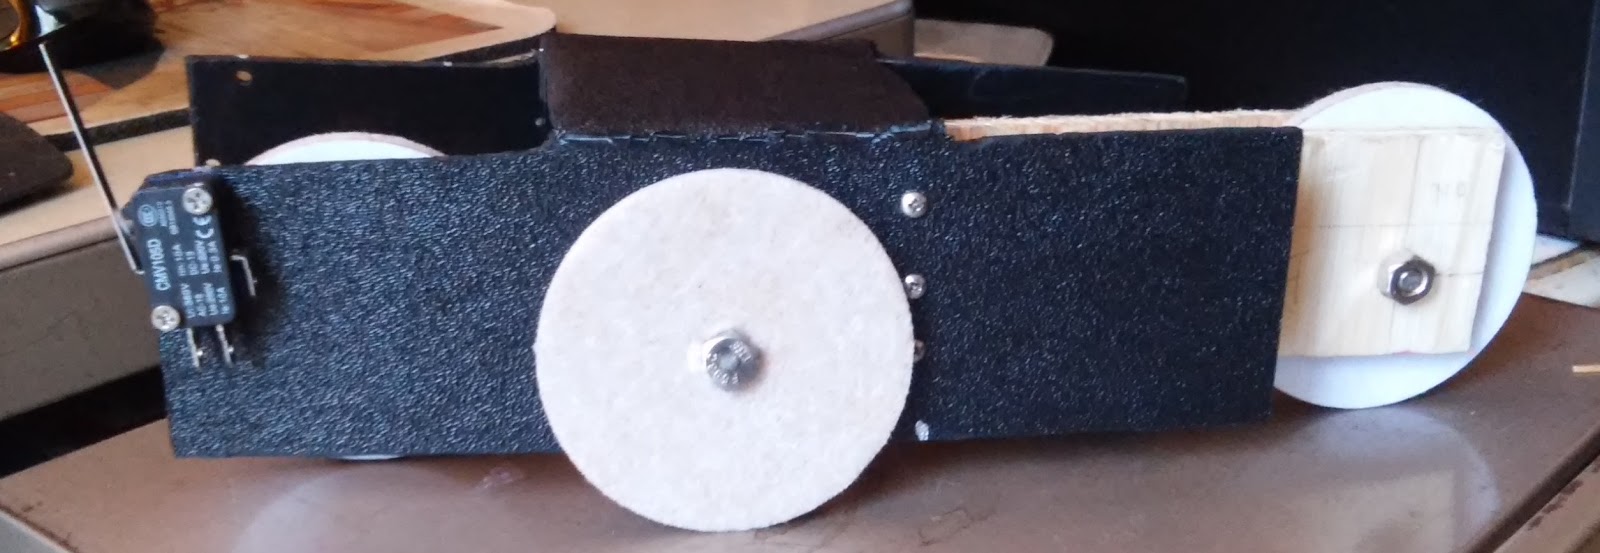
Now I needed an enclosure.  This is a case where a 3D Printer would be really handy so I could design my own (I'm working on that).  Stock enclosures almost always have standoffs in the wrong places, so at best the standoffs are useless and at worst are in the way and have to be cut out, AND they're never exactly the right size.

To recap last year's project, I had:
Ultrasonic Distance Sensor and 3" speaker from a defunct clock radio as peripherals, with an Arduino Uno, SD card shield, and an amp--all loose in the bottom of the cauldron (except the speaker and sensor). The battery was external.

The changes are:
  1. add an enclosure; mine is 5" X 1.75" X 2.5"--bigger than I really need but everything fits, including a half-sized breadboard
  2. change from the Uno to a 5V Pro Trinket
  3. use a MicroSD reader instead of the SD shield
  4. I considered a circuit board or perma-proto), but decided to keep the half-sized breadboard for modularity and simplicity
  5. move the battery into the enclosure and use a switch to power on/off (last year I had the 9V battery outside the cauldron, inside a switched battery holder
  6. as noted below, I used long header pins to connect components to the breadboard
  7. change the pin assignment for the Echo Pin from 7 to 6
I will need to connect 8 wires from the enclosure: 4 to the distance sensor,  2 to the speaker, and 2 from the battery to the switch so I'll need to have holes in the enclosure and devise a way to connect them (short of hardwiring). I have some Radio Shack RCA phono plugs and jacks for the speaker, and holes for the sensor wires and power wires. I will use JST connectors for the power and sensor wires.
Since I'm keeping the breadboard, I can use long header pins in the breadboard, and just plug the JST female ends into them.

Everything else is as in V1.

Issues along the way:

After I got an SD card reader that worked (see above), I had it all working.  Then I must have messed up a connection, because I was getting no sound. I suspected that the HC-SR04 was cooked, so I put on my FTDI board so I could use the serial monitor to see the testing messages I put in the code. Sure enough, it was not registering.  I had 2 more, so I swapped one in. same result.  Swapped the other in--all is well.  I knew I would need more, and my options were 2 for $9 at amazon or $0.88 each off ebay. I ordered 5, If one works I break even with Amazon.  

Next problem:  still no sound. I check every connection and reran everything, so I concluded that the amp was bad too (this happened in another project with the same amp).  I ordered 4 more. As soon as they arrived I soldered the header and terminal block and swapped it in.  No sound. I turned the volume to see if that was the problem,  Just in case, I checked the wiring again. Sure enough, the wire that was supposed to connect A- to GND was misplaced. I moved it and tiedd again. Still no sound. Remembering that I had adjusted the volume, I turned it back. Sure enough, I had turned it down earlier, so now its all good.

New circuit:


Parts

  1. enclosure (mine is 5"L X 1.75"H X 2.5"W)--I don't remember where I got it, but Radio Shack has several that are close, so does Micro Center
  2. half-sized breadboard
  3. Adafruit Pro Trinket (5V)
  4. Adafruit Micro SD Breakout Board
  5. HC-SR04 Ultrasonic sensor (link for example--it can be found for
  6. Adafruit Class D Amp 
  7. 3in 8 Ohm speaker (I took mine from a clock radio)
  8. SPST toggle switch
  9. Sparkfun FTDI Basic Breakpout (for serial debugging)
  10. 9V Battery  (or any power supply > 5V)
  11. snap-on battery cap with leads (for 9V--other options for other power--e.g., a 4XAA enclosure)
  12. female-female jumpers
  13. JST connectors
  14. RCA phono plug and jack
  15. long header pins 

Construction:

  1. Upload the code to the Trinket.  I really didn't have to do this first, but since is was written for the UNO on an earlier version of the IDE, I wanted to make sure.  All good on IDE version 1.6.5...and I had to do it again once I realized that I needed to re-assign the Echo Pin
  2. I used long header pins (long on both sides) in the breadboard, and used JST female ends to connect to them, and soldered the JSTs to the leads to battery/switch, sensor,  and amp. I used female-female jumpers to connect to the SD breakout (also Speaker Pin to the amp). The amp itself is plugged into the breadboard via its header pins
  3. Drill holes in the enclosure (1/8" for the wires to the JST's, 3/8" for the RCA plug--yes I put the plug on the leads to the amp and the jack on the leads to the speaker)
  4. Solder header pins on the Trinket
  5. Solder leads to the RCA jack and plug (only need one of each since there's just one speaker), and the JST connectors
  6. Connect, test, and go

Code

/*2014-10-05
Halloween Candy Dish: Play random sound when kid reaches into bowl
*/
/*2014-10-05 HC_SR04 Distance sensor code added
 Need to modify pins for Halloween (13&12 used by SPI)
 2014-04-26 Downloaded from Instructables
 HC-SR04 Ping distance sensor]
 VCC to arduino 5v GND to arduino GND
 Echo to Arduino pin 13 Trig to Arduino pin 12 (used 8&7 instead)
*/
/* 2015-10-14
 Change to Pro Trinket from Uno to put the circuit in an enclosure
 Echo to 6 (Pro Trinket does not have pin 7)
 see virgilmachine.blogspot.com
*/

/*includes*/
#include    //SPI library
#include     //SD card library
#include //library for playing sound

/*constants*/
#define SD_ChipSelectPin 10
#define trigPin 8
#define echoPin 6 //used to be 7 on Uno--Pro Trinket does not have a pin 7
/*variables*/
int song = 0;   // song number for random function
/*objects*/
TMRpcm speaker;   // create an object for use in this sketch

void setup(){
  randomSeed(analogRead(0));  //initialize random (A0 unconected)
  pinMode(trigPin, OUTPUT);   //pins for distance sensor
  pinMode(echoPin, INPUT);
  speaker.speakerPin = 9; //output to amp
  speaker.loop(0); //2014-10-05 do not play repeatedly
  Serial.begin(9600);
  if (!SD.begin(SD_ChipSelectPin))
     {  // see if the card is present and can be initialized:
     Serial.println("SD not initialized");
      return;   // don't do anything more if not
      }
   else
      {
       Serial.println("SD initialized");
     }  
  speaker.volume(1);
//  speaker.setVolume(7);   //attempt to increase volume
}

void loop() {
  long duration, distance;
  digitalWrite(trigPin, LOW);
  delayMicroseconds(2);
  digitalWrite(trigPin, HIGH);
//trigPin must me high for 10 microsecs to do ranging
  delayMicroseconds(10);
  digitalWrite(trigPin, LOW);
//duration is the time between pings of the sensor  in microseconds as returned on echoPin
  duration = pulseIn(echoPin, HIGH);
//duration is a round-trip, so divide by 2; speed of sound is 29.1 cm/microsec, so distance is in cm
  distance = (duration/2) / 29.1;
    Serial.print(distance);  //debug
    Serial.println(" cm");  //debug
//2014-10-05 If distance is <~5in someone has reached in 12/2.54cm=just under 5in
if (distance < 12)
    {
      song = random(1,10); //get random number from 1 to 9   sounds on SD card are 1.wav, etc.
      Serial.print("song: "); //for debugging
      Serial.println(song); //for debugging
      switch (song) {
        case 1:
          speaker.play("1.wav");
          break;
        case 2:
          speaker.play("2.wav");
          break;
        case 3:
          speaker.play("3.wav");
          break;
        case 4:
          speaker.play("4.wav");
          break;
        case 5:
          speaker.play("5.wav");
          break;
        case 6:
          speaker.play("6.wav");
          break;
        case 7:
          speaker.play("7.wav");
          break;
        case 8:
          speaker.play("8.wav");
          break;
        case 9:
          speaker.play("9.wav");
          break;
      }
        delay(5000);
  }
delay(50);
}


Saturday, October 10, 2015

@Make: Electronics Experiment 33 - Moving in Steps

This chapter ends with the concept for another robot, this time one that responds to light with photoresistors. I decided not to go all the way with that, because I just spent a whole lot of time on the last cart (much of it on fabrication), and because I plan to follow Charles' upgrade of Experiment 32 as published in Make Magazine (March 2015).

Actually, I had a little trouble with this. First, Charles said to use 12V motors, and I could only find 5V.  I found a set of that came with UL2003A driver boards on Amazon. I did not get the results I expected on the breadboard just using LEDs...I expected to see the cycle of pulses repeat, but it only did one cycle at a time.  I checked the connections many times, with no success.  This particular breadboard has been flaky in the past, but I'm, not willing to rewire the whole thing.

I drove the stepper using an Arduino Uno and some code I found in a tutorial on Instructables.

I made a video.

On to the Picaxe in Experiment 34!


Thursday, October 8, 2015

Generator House--Better Than the Design


This is the reason why I have not been posting much lately. This carpentry project has held my attention.

A couple of months ago I used my generator house project to test out SketchUp and 123d-design (see this post).  Here's how the house came out.  Thanks to my brother-in-law, who has real skills, the design was modified to make it sturdier, by adding a lot of interior support, and by replacing the 1X2s I had for the floor with 6" 5/4 decking.  The only major shape change was to reduce the roof pitch from 30 degrees to 15 (I used 30 to make the calculations of rear elevation and roof width simple),


Here are some photos to show the construction:


Monday, September 7, 2015

@Make: Electronics Experiment 32 Robot Cart - Together and Working, need to pretty it up

This took WAY too long, due to my fumbling.  Earlier posts and videos showed it working on a breadboard,  I needed to solder the components and circuit to a Perma-Proto Board, then connect the wires from the cart (motor + and -,  switches NO and GND).

Here's a top view of the working product:

Note the 4-pin connector I used to connect the 4 wires mentioned above through a hole in the Altoids tin to the circuit board.  That allows me to unplug the components on the cart to work on the circuit board if (WHEN) I need to, What look like stray wires are stubs for testing.  I'll reduce those during cleanup. The switched 9V battery holder is riding in the cover now.  I'll attach it to  the top of the tin with Velcro after I close it up.  I think I need a new Altoids tin--I kind of butchered this one making holes.

I added the rubber band around the driving wheel after the video for traction. It couldn't run on the hardwood floor without it.

Here's the video.

Stupid Soldering Tricks

There were reasons why it too so long.  I used 3 Perma-Protos. I would get it working, then something would go haywire.  I had a short someplace. I lost about a day fussing wit the power supply (see the right side of the photo above). I had been using 10uf and 1uf capacitors, but looked at the LM7805 datasheet and saw that the sample uses 33uf and ,1uf (same as in the book, p 182).  DUH. It said .33...so I chased that for a while, buit ibn the right components and still had a short.

I could not see anything wrong, so I decided to do a new board.  Worked OK for a while, but eventually wound up with another short.  I was ready to give up and just use a breadboard, but decided to try one more board.  After fussing with all kind of connections, I moved the 555 and reconnected everything pin by pin.  Of course, I started with pin 1 and the problem was on pin 8.  I had decided to use a 3-pin female header across pins 7-8 and the next row to connect the 33uf capacitor, so I could swap other values in and out to adjust the backup time (since I removed the pot).
I must have had a cross connection due to sloppy soldering under the header, because when I soldered in the cap direcly I had no  problem.

Now I was in business, but I had a couple of recurring problems.  I cleaned up some stray solder and it appeared to be OK.  It took a week, but I did it.

Finishing the Fabrication

I had everything working, connecting the cart to the circuit board with alligator leads.  I cut a 4-pin I2C cable in half to use as a connector to the cart, with the cut half to be soldered to the circuit board. I soldered the motor and switch wires to a strip of 4 extra long male header pins, and plugged that into the I2C connector. I tested the circuit after soldering each connection, and used head shrink to insulate the pins. The I soldered all the connections on the motor and switches.

What I need to do

  1. Screw the Perma-Proto to the standoffs and close the cover of the Altoids tin
  2. Velcro the 9V battery holder to the Altoids tin
  3. Use threadlocker on the wheels to keep them from wobbling
  4. Maybe screw the drive wheel to the motor (I would need to remove the motor to do that)
  5. Tidy up all the wires
  6. Put some WD-40 on the hinge so the tail moves more smoothly


Thursday, August 27, 2015

@MAKE #Electronics Experiment 32: Robot Cart (Part III - Cart is together)

The saga continues...

I put the pieces of the cart together as shown here:
I attached the hinge to the body only to expand the pilot holes to make it easier when I put the movable wheel assembly together (see upper right).  The wheel at the lower right has the mounting wheel for the motor ready to go.

Next step was the wheel assembly.  I needed 1" #6 bolts to put the 3 pieces together (each piece is 1/4").  Once I got it together I realized that it was upside down (the holes for the axle needed to be on the bottom), so took it all apart and reassembled.

Next was the driving wheel. The pre-drilled holes in the mounting wheel were not big enough for any screws I had or could get quickly, so I reamed them and used #4 sheet metal screws (needed 1/2"--another shopping trip).  Pan head screws won't do because the wheel needs to clear the motor. Even with flat-head screws I had to file down a small plastic cylinder on the motor, which has no use that I can discern.

Now I was ready to mount the motor. I was clueless here, but I thought ahead enough to buy a mounting bracket, which attaches to the motor with a #4 machine screw (again, 1/2" flat-head). I measured the cylindrical piece to the motor--it's 3/4". I drilled a 3/4" hole in the ABS side (3/4" from the bottom like the other wheels, and over enough so that the wheel did not extend beyond the front of the body--2.25" in). I had to file the hole to get the motor through it, but it's in and stays put. The bracket doesn't do much, but if I need to secure the motor later on, I can screw it to a piece of plywood that I secure to the frame.

The motor is a Solarbotics GM2 Offset Shaft Gear Motor. I used a Solarbotics GMW mounting wheel, and GMB28 Mounting Bracket.

Next was the limit switches.  They need to be in the front with the sensors out so that when they hit something the switch will activate the timer sequence and flop the relay for 5 seconds, reversing the motor. (See my post, including a video, on the circuit.) I drilled the holes (1/8") on both sides but only mounted one, using 3/4" #4 machine screws and nuts.  I'm keeping the other connected to the breadboard circuit for the final pre-completion test.

Next Steps:

  • test the circuit again
  • construct the circuit on an +Adafruit Industries Perma Proto Board and mount it on standoffs in an Altoids Tin with insulation on the bottom
  • test and rework as necessary
  • solder everything up and go


Here's what it looks like at this point:
Right view. Note the limit switch on the front.
Front view (driving wheel, motor. limit switch)


Rear view (moveable wheel assembly, hinge)

Left view (motor protruding through hole)


Monday, August 24, 2015

+Adafruit Neopixel Tiara on an Actual Tiara- Almost Built

Design change:  I have ruled out the CR1220's (not enough battery life, too hard to change), and the CR2032's (too bulky). +Becky Stern  was trying to push me towards a LiPo battery, and I resisted...but finally realized she is right. The 100mAh version is small and the right size to fit the tiara.

I sewed eacghneopixel to the tiara using silver
thread.  Here's the first, ready to go..
The "V2" on the back side happens to be on the
"data-in" pin, so I started there with each one.
Here's the tiara with pixels shown. I'm still have to clean up the stray threads.
The sewing took me an afternoon (not an expert), but I got it done and it's not too ugly.

Next I soldered the neopixels together (+ to +, - to -, DO to DI), then connected the Gemma to the first neopixel for a test, using alligator test leads--see the video. The soldering took a couple of hours. For each wire, I used calipers to measure the distance between neopixel pads, stripped 14", marked the desired length of unstripped wire (from the calipers), cut the wire 1/4" beyond, and stripped 1/4" off that end.

I did the data bus first, and used stranded wire.  That turned out to be a huge pain--it's too flexible and the ends are hard to deal with.  I switched to 22awg solid core wire for the power and GND busses. Much easier.  I will go back to stranded when I wire the Gemma, because I will need the flexibility.

Also, I discovered (or remembered, not sure which) that Gemma has an on-off switch on board.  That simplifies this circuit (I don't need to add a switch).

Next:

  • trim stray threads and wire to clean up as much as possible
  • re-sew at least one of the neopixels (some threads got burned during soldering)
  • secure and insulate the threads and wires with nail polish
  • add the 100mAh battery
  • glue the Gemma to the tiara
  • solder the Gemma connections to the circuit, attach the battery to the tiara.


Parts list:

Saturday, August 22, 2015

+adafruit Neoplxel Tiara on an actual tiara

This is an ongoing saga. I got the idea to put the neopixel tiara on an actual tiara for my granddaughter's Nursery School graduation in June. I could not find a suitable plastic tiara, and the the metal one I built needed so much insulation that it was ugly. Also, the Gemma and battery back make it unwieldy for a 5-year-old. Here's a video:


I found some plastic tiara's that are not great but the may do the rick. Here's a photo comparing the two:

I took the metal one down for her graduation, and I brought my spare, unwired.  She wore the plain tiara all day every day, but was not impressed by my circuit--as I said, ugly and unwieldy.So, back to the workshop. I'm planning something for her 6th Birthday this Fall.

I got lots of help from Becky Stern of Adafruit, on air on Wearable Wednesday, and on the Adafruit Support Forums. The code is the same as my Twinkling Daffodils, except that I use a different pin on the Gemma than I did on the Trinket for the Daffodils (convenience).

I took out another Gemma and programmed it.  BTW, since I last worked on this the Arduino IDE wend from 1.6.3 to 1.6.5.  I had 1.6.4 installed, with the Adafruit boards added in.  After I upgraded to Windows 10 last week, I upgraded the IDE to 1.6.5.  It was a completely painless upgrade.  I didn't have to reload any of the Adafruit stuff or any drivers, and Windows 10 did not interfere at all.

I plan to glue the Gemma behind the middle of the tiara, sew or glue the 6 neopixels in the loops (as in the metal one), and glue the battery pack to the front of the comb.  I can try CR1220s, but they will provide 40mAh.  With 20A for the Gemma and 20 for the neopixels (varyung colors and brightness and not on at the same time), they might last an hour.  (Thanks to Becky's tutorial on batteries.) The problem is that it's hard to change them.  I may have to glue a CR2032 battery holder, or maybe use the sewable holders.

Anyway, I have a fun project to work on while I'm doing the Robot Cart at the same time...and, Halloween is coming!

@MAKE #Electronics Experiment 32: Robot Cart (Part IIA-Better)

3rd attempt at the cart.  Used a hand saw this time, and my handy drill. I marked Xs on the pieces I want to cut out to remind me what I'm doing.

Cart is now fabricted.  You can see some damage from bending the frame, but it will do for now.  I may redo it if I like the final product and want to showcase it.
OK, so I can't follow directions. It's a good thing I bought 10 sheets of ABS, because I have ruined 2 now, and may need another.  I got through my measuring, drilling and cutting, only to see that I pu the cuts on the wrong side.  So, I measured and drilled again...that's the top photo..and took the step to mark the pieces that wanted to cut out.

I made the cuts. used my heat gun to soften the plastic, and bent the sides.  I left the final cuts (removing the short pieces on what would become the top) so I could bend those into a position to cut them.  It was ugly.

I'd like to say that I started on the wrong side on purpose (one side is textured and the other smooth), but it was by mistake. It turned out to be almost OK because I had significant shaping and deburring to do, using my Harbor Freight Dremelish tool.

When I bent the frame back to put the textured side out, there was some damage (see lower photo).  It's usable as-is, so I'm going with it.  If I really like the cart when it's done. I'll redo the frame.

Next:
By some 14" plywood, the hardware (hinge, bolts, nuts, screws), and maybe some 3" disks to use as wheels,  as suggested by James Floyd Kelly.

Friday, August 21, 2015

@MAKE #Electronics Experiment 32: Robot Cart (Part II)


So, carpentry and fabrication are not my strong suits. Evidently I'm not real strong on following directions, either. Anyway, this is pass one, and I'll keep at it.

The good news:  I proved that I can use the 12"x12"x1/8" sheets of ABS (that I bought from Amazon about a year a go thinking they's come in handy) for the main cart body.  They're not thick enough to screw into, so I'll add 1/4" plywood, or maybe see if I can find 1/4" ABS.  I was able to cut the sheet to 9"x8", drill holes for rounding corners, then cut the rest, and use my heat gun to soften it for bending into shape See Fig. 5-92 on p. 275.

Problems:
  1. I used the wrong saw. That's why the cuts look ugly.  I knew that, but I bought a reciprocating saw at Harbor Freight and have been dying to use it.  I'm going to a hand saw, maybe a coping saw. 
  2. I drilled 3 of the holes in the wrong place. The idea is to have 1/2" diameter holes to round the 4 corners of the cut ABS, but you need to drill the holes in the inside of the cut, not the outside (that's why you see some holes that don't appear to be random--they are just wrong).
Other than that it's great.  I'm ready for pass two, and I learned a lot.

Tuesday, August 18, 2015

@MAKE #Electronics Experiment 32: Robot Cart

I'm ready to start on this. First step was to gather the materials.  The parts list on page 268 is incomplete, although on p. 276 there's a "you will also need..." See the schematic on p.277 and this blog post by +James Floyd Kelly  (it's on experiment 31, but references shopping for 32). The 50K potentiometer shown in the schematic controls the time the motor runs in reverse before going forward again.
Make: Electronics by Charles Platt, Figure 5-98. p.277 (in the edition I have)

Also, the erratum on p. 277 mentions adding a diode or transistor. I'm going to try a diode (handsonelectronics says diode).

I found that my DPDT relays on hand are not appropriate. Some are latching relays bought for experiment 20, and the other was 12V, so I ordered two 5V DPDT non-latching relays from Amazon.

Charles spends a great deal of time on fabrication and not much on the circuit.  Since I care more about the circuit, and there are some issues with it, I'm going to build that first. I'm going to try to use plastic for fabrication. I have some 12"X12" pieces of ABS, and the shell of a multi-function printer that I tore-down.

Here's the concept:
When switched on, the cart moves forward until one of the microswitches hits something, it cuts power to 555 Trigger Pin 2, causing the the Output Pin 3 to pulse the relay, which then flops, reversing voltage to the motor, which reverses. The timer cycle (determined by 555 Threshold Pin 6 and Discharge Pin 7 as powered by the capacitor/resistor combination along with the Pot). When the cycle ends, the Output Pin 3 goes low and the relay flops back, causing the motor to reverse again (making it go forward).

The time it reverses starts at ~5 seconds (47uf cap*100000Ohm resistor = 47//1000000*100000 = 4.7). The Pot did not make much difference, if any. I thought it did, but it turned out that I had unhooked the 100K resistor. DUH.

I had other DUH moments in this, but I was helped immeasurably but people running into the same problems I did, particularly +James Floyd Kelly .  Thank you James. First, I bought a 5V gearmotor from robotshop .com. I fussed around for way too long trying to figure out how to wire it--then I noticed the two copper tabs on the neck.  Second, I was getting weird buzzing from the relay, and the motor was not reversing. I remember the symptoms from James' blog. My relay had different pinouts from the schematic. There are 8 pins. If you number them 1-8 starting with 1 at upper left and go counter clock-wise, I needed to switch pins 2 and 3 on one side and 7 and 6 on the other.  I could not find a datasheet for this relay, but I had a similar issue once before with another DPDT relay, so I guessed.

Third problem was the diode,  The motor would not reverse, but fortunately I had seen this before (thanks James), so I added the diode across pins 1 and 8 of the relay with the cathode towards pin 8.

I also struggled with wiring the switches.  I tested it with just the switches, power supply, and a meter, and came up with:
555 Trigger Pin 2  to switch1 NO prong, connected to switch 2 NO
Both NC Prongs connected to GND
Both COM prongs (on the side--at least on mine) connected to GND

If neither switch is pressed, current is flowing to the trigger pin through the 10K pull-up resistor making it high and thus the output pin is low. When either switch is pressed, the trigger pin goes low, making the output pin high, and flopping the relay and reversing then motor.  The output pin stays high until the 47uf capacitor dishcarges (4.7sec) to the threshold pin, making it high and setting the output pin back to low, flopping the relay back and the moving the motor in the original direction.

It works.  Here's the video.

Monday, August 17, 2015

Windows 10 may just be worth the price

I upgraded 4 computers to Windows 10 with the free offer, and assisted with a fifth.

So far, when it works it seems to be OK. However, there were problems.

Note that the Microsoft support forums indicate that these have been around since early in the pre-release process, so Microsoft is well aware of the problems. They choose not to fix them before releasing the product, and  even more inexcusably, chose not to warn users that these problems were possible and provide a simple workaround.

Critical Error:
Screen flashing, making PC unusable (2 out 5 computers)
After installation, everything appeared to be OK, then I entered the log-on password and the screen went bonkers.  There was a simple fix for this (ctrl/alt/delete, Task Manager, More Details, File/Run Net Task, msconfig, services, then battle the flashing screen chaos to find "Problem Reports and
Solutions Control Panel Support" and "Windows Error Reporting Service" and untick them.  It's very difficult to spell msconfig with the screen blinking wildly, but perseverance is rewarded. Reboot and it's OK.

There were 16 pages of comments on this on the MS Support forum, and I soon as I encountered it, my brother called to say he got the same thing (he's the 5th computer). So, this is something MS let happen to their users, with no help.

Serious Error:
Unable to set up a Homegroup
This is another that was widespread.  Click on Homegroup, there's an option to join a homegroup. Follow through with the old password  and MS tells you it can't find the old Homegroup but won't let you create a new one.  The answer, for me, was:

  1. Shut down every computer on the network but one 
  2. on the running computer, go to C:\Windows, enable hidden file acesss (file explorer "View" tab, tick "Hiden Items" )., then navigate to C:\Windows\ServiceProfiles\LocalService\AppData\Roaming\PeerNetworking and delete everything that starts with "idstore" (there may be 1-3 files). If the files aren't there, try another computer (after verifying that you can view hidden files).
  3. reboot
  4. go to Homegroup, create one, and write down the password
  5. start up each of the other PC's, click Homegroup, join, and give the password that the first one got
Serious Error:
The above worked on the first computer, then I was able to add 2 more.  On the 4th, however, I got a message, after entering the password, that I needed to enable IPv6.  I checked my adapter configurations, and saw that it was enabled.  On the interwebs, I found that I needed to edit the registry (search for regedit and run it, then navigate to HKEY_LOCAL_MACHINE\SYSTEM\CurrentControlSet\services\Tcpip6\Parameters and double click DisabledComponents to edit, and set the value to zero.

First problem: there was no Parameters entry under Tcpip6. I pointed this out to the MS Engineer on the support forum, and got no response. I thought about it for a while and wondered if wireless was an issue.  One of the other computers that upated successfully was wireless, but... So, I disabled wifi, shut down the computer, plugged in an ethernet cable, started up, and viola, I had the registry entries listed above. I updated DisabledComponents to zero, exited regedit, and rebooted.  I was able to join the Homegroup.
This is another common problem, although not as widespread as the others.


These are what are known in the business as bugs.  Users have a right to expect that known bugs will be fixed or that simple workarounds will be provided and that users will be warned ahead of time.

There is no excuse for this.


Tuesday, August 11, 2015

Sketchup vs 123D Design

Let me say from the start that this is not a fair comparison.  When you start using anything, you have a lot to learn.  I started with SketchUp, found it (and me) lacking, and decided to explore 123D Design.

Criterion #1--free. Both qualify.  Why these two?  SketchUp is well-known, and 123D Design is used by the guys on +Adafruit Industries 3D Hangouts (+Noe Ruiz an +Pedro Ruiz). 

I bought a generator this Spring (Harbor Freight, 7000W) and decided to build a house for it.  Since I needed plans, and since I am threatening to buy a 3D printer, I decide to use the opportunity to learn a design tool for 3D models.  I started with SketchUp.  There are some very good tutorials, but my complete ignorance really got in the way. I was able to create a model, and then a beeter one once I figured out that I messed up by leaving stuff around and inadvertently combining sections. Here's the second try:

This was good enough to build the house, but there was enough stuff that was wrong and/or didn't fit to make me want to try something else, so I went to 123D Design.

123D Design documentation is awful. There are a few tutorials, but they're short and basic. Using what I'd learned from SketchUp I was able to start. I needed the tutorials, because there are enough differences to require that. Once I got started, I went to one of +Noe Ruiz's "Layer By Layer" videos on the adafruit blog. I learned enough technique to be able to use the tool. Here's what I wound up with:

I made some more design decisions in the process, but I like this much better.


The moral of the story may be to keep working at it, but I think I'm going to stick with 123D Design. As I said, it's not a valid tool-to-tool comparison becuase I was learning through the whole thing, but I thing 123D has a better interface, even if it is undocumented.  With +Noe Ruiz 's help, I'll master it (or at least get good enough).

@MAKE #Electronics Experiment 31: One Radio, No Solder, No Power with thanks to @sqfield (+Simon Field)

This is one of those things I've wanted to do for over 55 years.  If I'd only had more motivation and more support, I would have.  Water under the bridge, so here's my attempt now.

First of all, contrary to Charles' title, there was solder: I was too aggressive with my stripping to create the tapes in the coil, and cut the wire, so I had to solder the two pieces together and add some heat shrink for insulation.


Parts ready for assembly: coil with taps ever 50in, wrapped around vitamin bottle, spool of solid core 22awg hookup wire for ground--40ft left after the coil, germanium diode (on top of the white spool), 100ft og 16awg stranded wire for antenna, piezoelectric earphone, hose clamp to connect ground wire to water pipe. The earphone I bought (from SciToys) has a plug on the end, so I bought a jack for it from Radio Shack and connect the ground and earphone wires to it.

This is +charles platt 's experiment, but he directs the reader to scitoys.com for parts. This website, run by +Simon Field, has a wealth of fun projects.

Before adding the coil and the antenna, I tried a couple of suggestions from SciToys. First, I touched one end of the diode to a water pipe for ground and the other to the ground contact on the phono jack. I held the audio input (left, because it's a stereo jack and the left is where the contact on the mono earphone is) to use my body as an antenna. Got nothing.  Next, I taped the hookup wire to the water pipe and cut off a length of wire that would allow me sit in a chair on my patio, and connected that to the ground on the jack with an alligator clip.  I connected one end of the diode to audio input and held the other end, again being the antenna. Still nothing.

There is an AM tower within about 3 miles, so I think I should be able to get something. Next, I tried adding the coil and the 16awg antienna.  There is lightning in the area for the next couple of days, so I stayed inside: I ran about 60-70ft of wire up the basement stairs through the living room and around the family room. Then, I went back to my basement workshop and assembled what you see in the photo below.
The black and red wires at the bottom go to the water pipe and upstairs.  The green alligator clip lead goes from ground on the jack to the taps on the coil. The red alligator clip lead goes from the diode to audio input on the jack. The paper clip hanging from the tap (upper left) marks where I heard something.
When the weather clears I'll try the antenna outside, but here's what I got:

  • I heard static right away in the earphone
  • When I moved from tap to tap, the static went away--silence
  • At one pint, on one tap, I heard some Spanish--SUCCESS! I couldn't get it back, but I'm happy
I will post again after I move outside. I have some other components too, like a variable capacitor and a coil+ferrite rod, so I will plan adding those while I'm waiting for the weather to clear.


Tuesday, July 28, 2015

LG W2243T-PF Monitor (NOT) Fixed

Position of capacitors on the power board
From this ebay listing
This was going to be a success story.  My monitor went dark (well, it just flashes the LG logo, then the display, then goes dark--it does with 2 computers).  This was actually a refurbished model that LG sent me to replace another (different model) that went dark about 3 years ago.  This one was originally manufactured in 2009, according to the sticker on the device.

This repair is something I never would have considered until I began my electronics hobby at Christmas 2013.  I didn't even know how to solder until a few months after that. Now, after numerous blinking light and other educational projects (see the rest of this blog), I had the opportunity to do something useful.

Unfortunately, this repair did not do the trick--so either something else is wrong. or I did not fix it properly (I think the former, because there is no change in the monitor's behavior, but I'm perfectly willing to accept blame.  But this was educational, and only cost me about 50 cents US in parts to apply.

I was aware that faulty capacitors were probably the cause, so I found the ebay listing above, for a "repair kit" and a couple of YouTube videos.  The ones where it all goes smoothly are not very useful, because things rarely go smoothly.  I found one where the author struggled to get the case open and that's the real challenge. Find it here. I killed my fingers, as the author indicated, and the final push required the gentle insertion and twisting of a screwdriver, but I got it open.

Note: the author of that video only wanted to remove the stand.  To someone remove the capacitors after having an easier time opening then monitor, try this one.

Once it was open, the rest was fairly straightforward.  I marked the location of the wires I disconnected, and removed the housing, which was taped on. I was then able to remove the circuit board for the power supply (4 screws), turn it over, and see that some of the capacitors were bulging, showing signs of stress. Since I had appropriate replacement capacitors in the 125 assortment in  this kit on ebay, which cost about the same as the repair it, which only had 6 capacitors (so I still have some subset of the 119 remaining capacitors).
Open, turned over, housing marked to id wires for replacement
Housing opened and turned over
Circuit board removed. Note bulges on some capacitors

The capacitors on the board were 1000uf 16V and 470uf 35V, all 105 degrees C.  Mine were the same, except that the 470ufs were 50V.


Capacitors removed

Desoldered Board

New Capacitors in place

Thursday, July 9, 2015

@SciToys Steam Experiment


Soda Can crushed after driving the air out by steam and dunking the open end in water

I get weekly science experiments from +Simon Field. I saved this on until my 5-year old granddaughter was here.  We did it today, and she was fascinated (so I am very happy)

video from scitoys

@MAKE #Electronics Experiment 30: Fuzz

From Make: Electronics, by Charles Platt. Sebastopol, CA: Maker Media, Inc, 2009, p 259.

In Experiment 30, we are creating distortion rather than filtering.  It's really an extension of Experiment 29, using a schematic similar to part 2. The differences are:
  1. The 10K and 33K resistors on TEA2025B IN1 pin 10 are replaced by an 820 Ohm resistor. The audio input still comes in at this point.
  2. There are no filters. The speaker connections go directly to OUT1 (pin 2) and OUT2 (pin 15) of the amp. 
  3. The 680K resistor on 555 and 500Ohm Pot on output pin 3 of the 555 are replaced by a .1uf cap, going to the base pin of a 2N2222 transistor (Q1). The rest of the 555 connections are unchanged. The 100K Pot still adjusts frequency.
  4.  The big difference is the addtion of the transistors.  The collector of Q1 is connected to power through a 33K resistor. The emitter of Q1 is connected to a 1K resistor and 1uf capacitor, which are also connected to the emitter of Q2.  Q2's base pin is connected to the 33K resistor, power, and Q1's collector. Q2's emitter is connected to a 100K pot through an 8K2 and 390 Ohm resistor and .22uf cap, with the other side of the pot connected to the audio input.
The transistors amplify the waveform coming from the 555, as adjusted by Pot1.  This signal overwhelms the amp, causing distortion to a degree determined by Pot2, which Charles calls the "fuzz adjuster."

I spent some time with the datasheet for the TEA2025B.  It's a stereo amp that we used in "bridge mode" for these Experiments 29 and 30.  The leads to the single speaker are connected to OUT1 and OUT2 (pins 2 and 15), and the audio input goes to IN1 (pin 10). In stereo mode, each speaker would have one lead connected to an output and the other to GND, and the additional audio input would connect to IN2 (Pin 7), which would have the same .22uf cap + resistor combination as IN1,

Another interesting experiment.  I plan to fuss around more with the TEA2025 and associated resistor and capacitor values, just for grins.

One curiosity: as reported here and by +Eric Buijs, the TEA2025 overheats, and overheats a lot at 9V.  I was having trouble getting go0d results from this experiment, so I decided to swap out the chip. It hat melted the breadboard under it, and the new chip gave me what I expected (including overheating).  The datasheet says it will take up to 15V, but at least 2 of us have experienced overheating.


Wednesday, July 1, 2015

@MAKE #Electronics Experiment 29: Filtering Frequencies Part II


Note: first, apologies to +Eric Buijs who noted that the TEA2025B runs hot at 9V.  I either did not notice or did not perceive that in part 1. However, in part 2 I experienced the same thing. Using an adjustable wall wart, I was able to apply different voltages.  9V works best, but it runs at safer temps at 7,5V and 6V. Besides the heat, the biggest difference is the volume coming out of the speaker (see video at link below).

Part 2 of this experiment involves adding a 555 timer in astable mode (with resistors and capacitors) and two pots: a 500 Ohm for volume control (between output pin 3 of the 555 and the input of the TEA2025B) and a 100K to manipulate the waveform (between 555 discharge pin 7 and threshold pin 6). I skipped the buttons for this exercise, and connected it with each filter and with no filter at all. The differences are discernible.

I did not have a 500Ohm pot, so I used a 1K.  It really only worked as a volume control at 9V.

Charles says to disconnect the audio source and use the timer as input to the amp.  I also added my cell phone playing Pandora back in.  It works for that, too.

A very worthwhile experiment. I'm looking forward to doing more with audio.

Here's the video.

Monday, June 22, 2015

@MAKE #Electronics Experiment 29: Filtering Frequencies Part I


I know very little about audio, etc., so this experiment is very interesting to me.  When I was 10-12 years old, I read about people making hi-fis, ham radios, and the like, and thought I'd like to do that someday.  With neither persistence nor guidance, that interest was never nurtured, but it was always somewhere within me. Thank you Charles for helping to bring it back. 

The photo below shows the breadboard, nearly complete according to the instructions.  The two momentary, normally open push-button switches are for the two filters. The coil is not shown--110ft of 20 gauge hook-up wire, which I had to unwind./rewind to get access to both ends. I used two 22uf electrolytic capacitors, back-to-back, instead of the 10uf NP cap Charles had in the schematic.  I could not find .15uf caps, so I used .22uf. I took the speaker out of an old Sony Trinitron TV before I took it to the dump (also got some pots and other useful stuff). Since I'm totally ignorant, I wasn't following Charles' instructions for connecting audio, so I bought some plugs to fit into the adapter. Once I took the plug apart and saw the connections, I understood what he meant. Since I spent the money (US$4.99 for eight at Radio Shack), I'll use it. Besides, it gives me an excuse to solder. The box for the speaker is a US$1.99 pencil box from K-Mart.  I use them for project boxes, but this seemed like a good application.

Breadboard almost ready, speaker taken from an old TV set, RCA adapter from Radio Shack, and a pencil box from K-Mart

The next photo is the speaker box after I drilled holes. Not the tidiest of jobs, but I think it will work.

Pencil box ready to be a speaker enclosure

Next step, hook up the filters and the music (I'll plug the adapter into my cell phone and play something on Pandora).

The idea is to bring mono input into the amplifier chip. The output goes through either a high-pass (caps) or low-pass filter (coil) to the speaker. I used the RCA adapter to get sound from my cell phone, plugged into one of the jacks in that adapter, and wired the plug to ground and to the 33K resistor/amp input.

Everything hooked up as expected. There is a big difference with and without the coil, not so much with and without the caps. The coil provided more difference after I removed the 33K resistor (also less noise). I will try using smaller caps. In the next post I will add the 555 timer and pots.  I'll add video there too.

This was another simple, but informative experiment.  I love this book. See you in part 2.


Saturday, May 16, 2015

Twinkling Daffodils Based on Adafruit Neopixel Tiara (As Seen On Adafruit Show-and-Tell)

This was a fun project.  The final tiara project its for my granddaughter's pre-school graduation. I would have done a mortar board, but I think it might be unseemly for a 5-year old to wear a tricked-out costume in her procession, so I decided on a tiara that should could wear at family events to celebrate her accomplishment.

Rather than the headband plus wires in the tutorial, I decided to buy a tiara and add the neopixels to it.  I looked all over Michael's, AC Moore, ToysRUs, Itzaparty, etc, and found nothing suitable, but I found this online and bought 2 so I'd have one for backup.

Meanwhile, I was preparing for our local "in-Bloom" festival and decided to see what I could do with fake daffodils. That same day (but I had the idea first) Wearable Wednesday had a floral bouquet project, so I knew I was on the right track. It turns out fake daffodils are hard to find, but AC Moore had a fake potted plant.

Here's what I bought to add neopixels to

I'm in this to learn, and I was not disappointed by this project.

What I learned (or at least some of it...some things re-learned)

Screen shot from video re tiara on a breadboard
That's a 3V Trinket with 4 neopixels connected to 3V pin on Trinket via breadboard
Powered by a DIY 5V regulated power supply
  1. See my post on setting up the neopixels on a breadboard...that was the initial test. I got it going with 4 neopixels, both a Gemma and a 3V Trinket, and some alligator clips
  2. I wanted to add colors to the code supplied.  The comments are pretty clear:  
    // Here is where you can put in your favorite colors that will appear!
    // just add new {nnn, nnn, nnn}, lines. They will be picked out randomly
    //                          R   G   B
    uint8_t myColors[][3] = {{232, 100, 255},   // purple
                             {200, 200, 20},   // yellow
                             {30, 200, 200},   // blue
                              };                   
    // don't edit the line below
    #define FAVCOLORS sizeof(myColors) / 3
    However, I was not sure about the  [][3] construct (i.e., not specifying one dimension of the array).  Some Googling revealed that if the array is initialized, the dimension can be omitted. This one is initialized, so all I had to do was  more colors (more rows of {R,G,B}). The comments in the example code say that, but not why.  I have been programming for 40 years in a variety of languages, so arrays are very familiar--sometimes I just have to learn the details to apply them with understanding. So, I added 5 colors.  
  3. The tiara example shows the neopixels powered from the 3.3V pin on the Gemma, and that works with both a Gemma and a 3V Trinket. The Adafruit Neopixel Uberguide says to always power neopixels separately from the power pin on the microcontroller, and that they need 5V. As far as I can tell the guide is accurate, but for projects using a few neopixels from a Gemma or 3V Trinket, powering from the 3.3V pin works. The guide also says not to use alligator clips, but I didn't have any trouble with them for testing.
  4. The Uberguide says to add a 1000uf capacitor across the + and - pins of the power supply, and also a 300-500Ohm Resistor between the data pin and the first neopixel.  I will reserve that knowledge for future projects. Becky's tiara tutorial does not mention this, and the circuit works without them. Just for grins, I will add the cap and resistor to the daffodil circuit.
  5. Further, the guide says that if you're using a 3V microcontroller and power the neopixels from a 5V supply, you need a logic level shifter. I decided to stick with the tutorial for the tiara (3V Gemma with neopixels connected to 3.3V and GND on the Gemma), but for the daffodils I will use a 5V Trinket to avoid the need for a level shifter, and power the neopixels from power rail. not the 5V pin on the Trinket. I was going to power the circuit from  my 5V regulated power supply, but that adds an extra component, so I'll just solder a barrel jack on the perma-proto and use a 5V wall wart (I'd need power anyway to power the 5V supply). I'm using the Adafruit Compact Switching Power Supply.
  6. After fussing with ideas about an enclosure, I decided that I didn't need one. The circuit is very simple, and I don't need a lot of internal connections. So, I'm putting it on a small mint tin size perma-proto, with a barrel jack for the connection to power. Since the power rails are down the center, I can place the trinket horizontally across the board, with the BAT and GND pins over the power rails, supplied by the barrel jack.  Since pin #4 is next to GND, I can modify the data pin in the code and connect DATA, GND, and Vcc to header pins to connect to the 3-wire connector and on to the daffodils.  That's it.  I will put 3/4" standoffs on the 4 corners of the perma proto to provide clearance.I don't need to solder anything other than the 3 wires to the Trinket...that will make it easier to reuse.
  7. Speaking of the 3-wire connector, I found some, labeled B2-2832, that I ordered a while back, I don't remember from where. Googling the number doesn't yield anything useful. Anyway, it simplified the wiring a lot.  I'll cut it in half, use the receptacle end to attached to  the Trinket pin and power rails, and solder the other ends to data. power and ground coming from the circuit.  I'll put the resistor in the connection on the data wire. 
  8. I had originally planned to put the neopixels inside the corona (trumpet part of daffodil). My wife, who understands crafty stuff better than I, suggested just positioning the neopixels outside of the flowers, to let flowers diffuse the light. This turned out to look better, and also simplify the project.  I would have had to clip out the flowery stuff inside the corona (fake pistil, stigma, and anther), poke holes in the corona for wires, and solder the inter-flower data wires and heat shrink on the flower.I made more work for myself because I started out with the original design in mind, but the tutorial reflects the improved process.

Finished Product

Parts, Supplies, and Tools

  1. Barrel Jack
  2. 5V Trinket
  3. 1000uf Capacitor
  4. 470 Ohm Resistor
  5. Breadboard (size not important, I used a half-size)
  6. Silicone-Coated stranded wire
  7. 22-gauge solid core hookup wire
  8. Heat shrink tubing
  9. 3-wire connector (optional, here's an example for illustration--or use what you have)
  10. header pins (also optional, but it made it easier for me)
  11. flora neopixels V2 (6) (I bought this sheet of 20--they also come in quantities of 4)
  12. small mint tin size perma proto-board
  13. 3/4 inch nylon standoffs & screws (4)
  14. 5V or switchable wall adapter
  15. Short alligator clips
  16. In-line power switch
  17. Fake daffodils in fake flower pot (you're on your own here--I found mine at AC Moore, try Michael's, etc.)
  18. Green florist's tape 
  19. Soldering Iron and requisite accessories--solder, stand, sucker, helping hands, etc
  20. Multimeter
  21. Flush Clippers
  22. Heat gun 
  23. If you really want to finish it off, put it in a suitable encosure and drill holes for power input and output to flowers--I did not do that

Construction/testing process

Note: this project could be accomplished without soldering, but it would not be as tidy, and you would need clips, and/or solderless wire connectors and/or a larger Arduio (like an Uno) to make connections via jumber wires. Making reliable connections to neopizels without soldering is tough. It's easy soldering, though.

1st neopixel soldered
Red to power, black to ground, white to data pin, yellow to next neopixel
Neopixels wired and ready for test

  1. See Fritzing diagram above.  The circuit is really simple, but the construction has a lot of steps, so...the first thing I did was verify that the above circuit works with a 5V Trinket, external power, and one neopixel.  (Note, this requires modifying the Adafruit NeoPixel_Tiara sketch to use just 1 neopixel.  See above for other possible changes--colors and timing, for example).
    That was fine, so I added the cap and resistor and that was also fine. As expected, but it's good to start with something that has been proven to work. Note that I recommend a lot of testing as you go through the project. It's a lot easier to find and fix problems as you build, rather than trying to figure out where you went wrong after the project is all put together.
  2. Next step, build up to a pre-assembly test.
    Solder + and - leads to neopixels in the lengths we'll need to go from the flowers to the circuit. Watch the data arrows on the neopixels--take care to match output of one to input of the next.
    Solder leads to BAT, GND, and pin 4 on the Trinket, in the lengths you'll need to connect to the perma-proto when you're ready.
    Using alligator clips, connect all the + wires to the power rail, all the - wires to the GND rail, the data wire to the resistor, and the other data wires to each other, and also to connect the Trinket pins to the + and - rails and to the resistor
  3. Fire up the circuit for a test (still on the breadboard). Make sure all the neopixels light up. If you want different colors, more or less colors, or different speed, change the code (see below). If it doesn't work, there are probably some missed connections or bad soldering.connections.  Check the direction of the arrows on the neopixel data pins. Keep the Trinket connected for the next test. Here's a video of this step.
  4. Now we're ready for the flowers.I had orginally planned to put the neopixels in then corona (the trumpet part).  My wife convinced me that the flowers diffusing the light would be a better effect, so I changed the design.
    Run the power wires, and the data wire to the 1st neopixel, down the stems and secure the wires to the stems temporarily. I used plastic twist ties. Continue the wires down the pot to join together in a common location at the bottom.Twist the + wires together for a power connection and the - wires together for the GND connection.
  5. Test
    Connect the flowers to the circuit on the breadboard again using alligator clips. If you left the Trinket connected it should be all set. Power it up verify and correct as before.
  6. Final Assembly
    a) Remove the alligator clips. [Making sure to check that the out arrow from one neopixel will be wired to to the in arrow of the next, put heat shrink wrap on one side of the data connection between flowers, solder the two sides together, move the head shrink over the connection and shrink with a lighter or heat gun.  Repeat for all 5 inter-flower connections. ] Not necessary if you connect directly, per new design.
    b) Solder the barrel jack to the perma-proto board. Plug the wall wart into the barrel jack and test the pins of the jack with a multimeter to be sure a) that the connections are sound and b) that you know which pin is + and which is -. With the multimeter on DC voltage, the reading should be about +5V. If it is not, there is a bad connection. If it says -5V, the meter leads are reversed.  Solder the + pin of the jack to the + rail (the one with the red line on it) on the perma-proto, and the - to the GND rail (blue line) using a short insulated wire.  The jack should be connected to holes that are part of the rail (i.e. with vertical interconnections--the first holes are not connected to the rail. (see photo)
    c) Solder a 3-pin header to horizontally across the power rails. One pin will be +, one -, and the one to the side of the rail will be connected to a perma proto row (holes horizontally interconnected).
    d) Solder one side of the 470Ohm resistor to the row the header pin is connected to, and the other side to the row to which you will connect the data wire (pin 4) from the Trinket.
    e) Solder the 1000uf capacitor across the power rail (watch the polarity: +pin to +rail, -pin to -rail)
    f) For stability, I attached a five pin long header with the plastic stopper above the perma proto through to female headers.  The holes that the top of the perma-proto are not connected to anything, and I did not solder this--it's just to hold the Trinket in place so I can reuse it easily.
    g) Place the top row of holes on the Trinket over the header pins from the last step. Solder the Trinket leads: BAT to + rail, GND to - rail, Pin 4 to the row the resistor is on.
    h) If the 3-wire connector has plugs.jacks at two ends, cut it in two pieces. You want the jack (female) end, so it will fit over the 3-pin header. Using alligator clips, connect the data, power, and ground connections to the 3-wire connector. Plug the connector to the header, and test. If there are problems, check all connections (and that you have powered the circuit).
    i) Using heat shrink wrap as with the inter-flower connections, solder and heat shrink the flowers to the 3-wire connector (taking care that the correct wires are connected).
    Here's a video of the circuit working from the perma proto...I just need to hide the wires and position the neopixels and finish soldering.
  7. Finish
    Test
    the final connection, and correct any problems.
    Remove the temporary twist ties, or whatever, from the stems, and wrap the wires and stems together with green florists tape.
    I wanted to be able to power on/off without unplugging, so I added the in-line power switch. I also added a second 3-wire connector as an extension.
    You're done

Bottom of perma-proto
Note vertical and horizontal connections

Top of perma-proto
Notte power rails in center

Perma-proto bottom, after soldering
Top view after soldering


Code (NeoPixel_Tiara by Adafruit, as modified by Virgil Machine)


/Random Flash animation for Neopixel circuits
//by Dano Wall and Becky Stern for Adafruit Industries
//based on the Sparkle Skirt, minus the accelerometer
/*2015-05-10 vm Daffodil project
Nneopixels in 6 of 11 fake daffodils in fake pot.
Designed for "Brewster in Bloom", advised by Becky's LED Bouquet project.based on the neopixel tiara project.
Uses 5V Trinket with pixels powered directly from power rails (not 5V pin on Trinket).
Powered by 5V Regulated power supply, which can be powered by wall wart or battery.
2015-05-10 */
#include <Adafruit_NeoPixel.h>

#define PIN 4  //2015-05-11 changed from pin 1 to pin 4 for ease of connection

// Parameter 1 = number of pixels in strip
// Parameter 2 = pin number (most are valid)
// Parameter 3 = pixel type flags, add together as needed:
//   NEO_KHZ800  800 KHz bitstream (most NeoPixel products w/WS2812 LEDs) 2015-05-10 vm we're using Flora neopixels v2
//   NEO_KHZ400  400 KHz (classic 'v1' (not v2) FLORA pixels, WS2811 drivers)
//   NEO_GRB     Pixels are wired for GRB bitstream (most NeoPixel products)
//   NEO_RGB     Pixels are wired for RGB bitstream (v1 FLORA pixels, not v2)
//2015-05-10  changed parameter 1 to 6 for 6 neopixels in daffodils
Adafruit_NeoPixel strip = Adafruit_NeoPixel(6, PIN, NEO_GRB + NEO_KHZ800);

// Here is where you can put in your favorite colors that will appear!
// just add new {nnn, nnn, nnn}, lines. They will be picked out randomly
/*2015-05-09 vm note the [][3] specifying the dimensions of this 2-D array
1st dimension (number of rows--colors in this case--is empty, which is legal
as long as the array is initialized in-line, which this is.  The second dimension, the columns,
is the RGB components. We can add a row (color) without changing anything else. I added 5 clors
to the purple, yellow, blue that were supplied in the example.
Line 40, declaring FAVCOLORS, calculates the # of colors using the size of the initialized array.
Line 58 gets a random number between 1 and FAVCOLORs do decide which color to use, at random
2015-05-09*/
//                          R   G   B
uint8_t myColors[][3] = {{232, 100, 255},  // purple
                         {200, 200, 20},   // yellow
                         {30, 200, 200},   // blue
                         {(0,255,255)},    // cyan
                         {(255,69,0)},     // orange red
                         {(0,255,0)},      // lime
                         {(255,0,255)},    // magenta
                         {(255,0,0)},      // red
                          };
                             
// don't edit the line below
#define FAVCOLORS sizeof(myColors) / 3

void setup() {
  strip.begin();
  strip.setBrightness(40);
  strip.show(); // Initialize all pixels to 'off'
}

void loop() {
flashRandom(15, 2);  // first number is 'wait' delay, shorter num == shorter twinkle 2015-05-08 vm changed this to 15 from 5--better for flowers
flashRandom(15, 4);  // second number is how many neopixels to simultaneously light up 2015-05-08 vm changed this to 2-4-3 from 1-3-2 for grins
flashRandom(15, 3);
}

void flashRandom(int wait, uint8_t howmany) {

  for(uint16_t i=0; i<howmany; i++) {
    // pick a random favorite color!
    int c = random(FAVCOLORS);
    int red = myColors[c][0];
    int green = myColors[c][1];
    int blue = myColors[c][2];

    // get a random pixel from the list
    int j = random(strip.numPixels());
 
    // now we will 'fade' it in 5 steps
    for (int x=0; x < 5; x++) {
      int r = red * (x+1); r /= 5;
      int g = green * (x+1); g /= 5;
      int b = blue * (x+1); b /= 5;
   
      strip.setPixelColor(j, strip.Color(r, g, b));
      strip.show();
      delay(wait);
    }
    // & fade out in 5 steps
    for (int x=5; x >= 0; x--) {
      int r = red * x; r /= 5;
      int g = green * x; g /= 5;
      int b = blue * x; b /= 5;
   
      strip.setPixelColor(j, strip.Color(r, g, b));
      strip.show();
      delay(wait);
    }
  }
  // LEDs will be off when done (they are faded to 0)

}